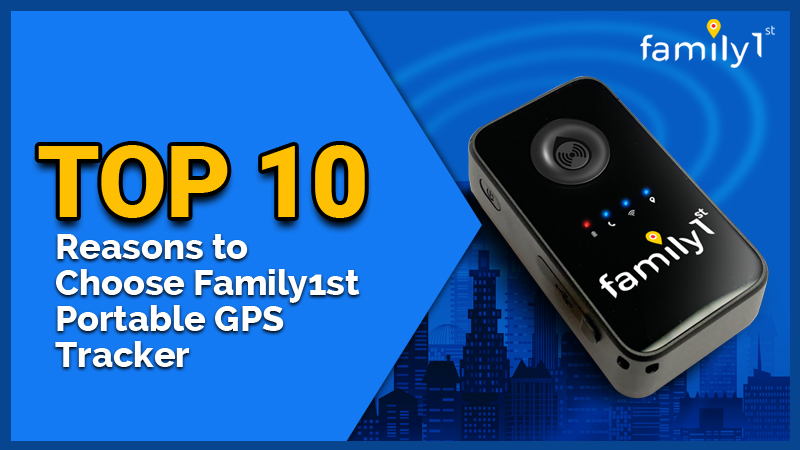
Top 10 Reasons to Choose Family1st Portable GPS Tracker

Family1st gives you the most cost Effective Device at $13.95 with Lowest Monthly Subscription of $21.95 along with that you also get Indoor Tracking Using Wi-Fi, 4G Cellular Technology, Integrated With Alexa ,Lifetime Warranty, Mobile App, Tablet and PC, 24/7 Tech Support, Live Chat On Account, 2 Weeks Active Battery Life, 6 Months Sleep Mode Battery Life

How to create geofence


Geofence is a virtual area that you can create on your platform, so as to get an alert when the device enters or exits that area
When you type in the address, it will appear below as you type it.
You have to click on this address confirmation that appears below the one you are typing (if you do not do this, you will get a reading of “Invalid Address”).
Then, you zoom into the location marker; and, drag the red marker to create a circular geofence spanning the desired area (the green marker is an “anchor” – it sets the center of the geofence circle).
You can edit and delete the the geofence by clicking on view/edit geofence. You can also edit the colour of the geofence, change the name of the geofence and change the size of the geofence to make it bigger/smaller. After making the changes you can select the save option and then confirm.

How to change password.

To change your passwords please go to www.family1st.io Then on the computer, log into your platform and select Settings - Change Password on the left hand side and then submit.

How to change trackers name

To change the tracker name please login to Family1st account then go to settings- add/edit vehicle and then under the operations click on edit/ select the icon and then click on update vehicle.

How to set alerts


Please login to your account and on the left hand side please select change alert setting. Select the tracker name from the drop down list. For each option that is enabled an email is sent out to the listed email. To disable alerts, select the "Change Alert Settings" option again and leave the checkbox unchecked for the alert option that you want to disable.
Note: For portable devices you will receive geofence alerts, low battery, speed alerts and function key alerts.
For OBD devices you will receive geofence alerts, speed alerts, ignition on/off alerts.

Current location and Real time tracking

To see the current location you need to login to your Family1st account and then you will see the current location on the page. The page will not refresh automatically. You need to refresh the browser or you can just click on the right hand side toolbar named as refresh tracker location.
Real Time: To view the real time click on the top center area of the tracking page.
Pressing the real button will open only the map in a different tab where you can watch the real time updates
The app does not support real time updates, so it will need to be refreshed. When in motion the screen will refresh every minute as per the subscription.

Quick Start Guide for Portable Device

When you will order the portable device you will also receive the quick start guide along with the packaging which will help you to set up the device.

There are 6 simple steps to follow:

  • Charge the device
  • Activate tracker
  • Check Network connection
  • Test Tracker
  • Deploy Tracker
  • Begin Tracking

Quick start guide for OBD

When you will order the OBD device from our website you will receive a quick start guide within the packaging.

There are 4 simple steps to follow:

  • Locate the OBD port on the vehicle
  • Connect the tracker to your vehicle OBD port
  • Activate the device by going to https://family1st.io/gpsactivation/ and fill in the activation form.
  • If the device shows the default location, if it does the blue light will start flashing every 3 to 4 sec, then take it for a 10 mins drive. After which it will start transmitting and update location.

Overview of the tracking page.

When you login to the account you will see the current location page and in the center of the page is the information box which tells about the driver name, time, date and the last location the device updated. The device will update once every 3 hours (180 minutes) while stationary. This feature helps conserve battery life. You can also see the battery percentage left, mileage, direction, speed, fuel reading. The fuel reading is only available for OBD not for the portable device. And at last you can see the location the vehicle last updated on the information box. You can see the map view and satellite view on the location page.

GETTING STARTED

Login to your account using the Activation details and link provided in the welcome email.


Once you login, you will be able to access your account home page.


ACCOUNT INFO

Account Info> Listed Vehicles :

This provides a list of all devices available on the account. To add additional devices to your existing account please contact support.


Account Info > Contact Email/SMS for Alerts :

It lists the email address and the phone number associated with the account. All alerts are sent to the email address and/or phone.

SETTINGS

Settings > Change Password :

Use this to change your password.


Settings > Change Alert Settings :

Enable the alerts available for your device. For each option that is enabled, an email is sent out to the listed email (under Account Information > Contacts). To disable alerts, select the "Change Alert Settings" option again and leave the checkbox unchecked for the alert option that you want to disable (while checking those that are to be enabled).


Settings> Change Time Zone :

Select the appropriate time zone as per your location.


Settings > Add/Edit Email/SMS for Alerts :

This option will allow you to add or edit contact for alerts associated with this account.


Settings > Add/Edit Vehicle

Settings > Add/Edit Vehicle :

Click on Add Button: After this select the device associated with the driver (this shows up after the driver first name and last name is submitted).

Edit Driver: Choose Edit Driver button > Select the vehicle > Click on Edit Driver radio button:
You can change the name or icon and then click on “Submit”.

If you wish to remove the driver from the platform, click on “Remove”


GEOFENCING

Geofencing > Create Geofencing Area :

To create a geofence, click on Create geofence> Enter the address (it will pop up below, select the address) and enter radius (keep it between 400-1000ft)>> Click on Submit It will show you the area selected, you can now “name” geofence and click on “Save” To differentiate between different geofences, you can also choose “Different colors” given the palate below


Geofencing > View/Delete Geofences :

This option enables users to scroll through all stored geofence locations. Up to 10 locations can be stored. To edit/delete any geofence location, click on the “name” of geofence> it will show the geofence and its details. You can modify the name and change the area.

You can update the geofence and click on “save”. If you wish to “delete” the geofence, click on “Delete”


TRACK HISTORY

Track History:

Select desired start and end date for viewing history. Select driver from the drop down list. Then, select the data points to be included in the chart as shown above and press "Submit" button. It will show you the complete “Track History” for the selected time period


REPORTS

Reports > Travel Log Report:

This option enables to list all the events reported. Select date range and driver. Additional events supported for OBD devices are ignition on, ignition off, tow alert on and tow alert off.


Reports > Travel Start Stop Report:0

This option enables to list all the start-stop events of the vehicle. Select “Date Range”>Select “Driver”> Click on “Submit”


Reports > State Mileage Report :

This option provides the states travelled between start date and end date for the driver being selected and the miles travelled corresponding to each of these states. It also provides the total miles travelled by the driver.
Select Date Range>Select Driver> Click on Submit> a request will be submitted. You can check the status of the report. Once the report is ready, you can click on “view” to check the complete Information


Reports > Mileage Report :

This option provides the mileage value at start date, mileage value at end date and miles travelled between start date and end date for the driver selected.


Reports > Fuel report :

This gives you data of approximate fuel consumption of the vehicle. (OBD DEVICES ONLY).


Reports > DTC report:

This gives you data of approximate fuel consumption of the vehicle. (OBD DEVICES ONLY).


Reports > Track Single Driver:

If you have more than one driver and you wish to track only a single driver, you can use this option.

Select the Driver> Click on Submit. This will redirect you to a new tab where you can track the device in real-time


Reports > Driver Safety Report:

This option provides a "Driver Safety Score" based on some criteria, for a selected driver. It also provides a detailed report on driver safety score results for the last 30 days.


Reports > Trip report:

This report helps to differentiate the trips and gives data according to the TRIPS


Reports > Current location Report:

This report gives the last location data of the device.

ALEXA

Enable Alexa support, to get Live Tracking details from Alexa enabled devices.


GETTING STARTED

Login to your account using the Activation details and link provided in the welcome email.


Once you login, you will be able to access your account home page.


ACCOUNT INFO

Listed Vehicles

Account Info> Listed Vehicles :

This provides a list of all devices available on the account. To add additional devices to your existing account please contact support.


Contact Email/SMS for Alerts

Account Info > Contact Email/SMS for Alerts :

It lists the email address and the phone number associated with the account. All alerts are sent to the email address and/or phone.

SETTINGS

Change Password

Settings > Change Password :

Use this to change your password.


Change Alert Settings

Settings > Change Alert Settings :

Enable the alerts available for your device. For each option that is enabled, an email is sent out to the listed email (under Account Information > Contacts). To disable alerts, select the "Change Alert Settings" option again and leave the checkbox unchecked for the alert option that you want to disable (while checking those that are to be enabled).


Change Time zone

Settings> Change Time Zone :

Select the appropriate time zone as per your location.


Contact Email/SMS for Alerts

Settings > Add/Edit Email/SMS for Alerts :

This option will allow you to add or edit contact for alerts associated with this account.


Add/Edit Vehicle

Settings > Add/Edit Vehicle

Settings > Add/Edit Vehicle :

Click on Add Button: After this select the device associated with the driver (this shows up after the driver first name and last name is submitted).

Edit Driver: Choose Edit Driver button > Select the vehicle > Click on Edit Driver radio button:
You can change the name or icon and then click on “Submit” .

If you wish to remove the driver from the platform, click on “Remove”


GEOFENCING

Create Geofencing Area

Geofencing > Create Geofencing Area :

To create a geofence, click on Create geofence> Enter the address (it will pop up below, select the address) and enter radius (keep it between 400-1000ft)>> Click on Submit It will show you the area selected, you can now “name” geofence and click on “Save” To differentiate between different geofences, you can also choose “Different colors” given the palate below


View/Delete Geofences

Geofencing > View/Delete Geofences :

This option enables users to scroll through all stored geofence locations. Up to 10 locations can be stored. To edit/delete any geofence location, click on the “name” of geofence> it will show the geofence and its details. You can modify the name and change the area.

You can update the geofence and click on “save”. If you wish to “delete” the geofence, click on “Delete”


TRACK HISTORY

Track History:

Select desired start and end date for viewing history. Select driver from the drop down list. Then, select the data points to be included in the chart as shown above and press "Submit" button. It will show you the complete “Track History” for the selected time period


REPORTS

Travel Log Report

Reports > Travel Log Report:

This option enables to list all the events reported. Select date range and driver. Additional events supported for OBD devices are ignition on, ignition off, tow alert on and tow alert off.


Travel Start Stop Report

Reports > Travel Start Stop Report:

This option enables to list all the start-stop events of the vehicle. Select “Date Range”>Select “Driver”> Click on “Submit”


State Mileage Report

Reports > State Mileage Report :

This option provides the states travelled between start date and end date for the driver being selected and the miles travelled corresponding to each of these states. It also provides the total miles travelled by the driver.
Select Date Range>Select Driver> Click on Submit> a request will be submitted. You can check the status of the report. Once the report is ready, you can click on “view” to check the complete information


Mileage Report

Reports > Mileage Report :

This option provides the mileage value at start date, mileage value at end date and miles travelled between start date and end date for the driver selected.


Fuel report

Reports > Fuel report :

This gives you data of approximate fuel consumption of the vehicle. (OBD DEVICES ONLY).


DTC report

Reports > DTC report:

This gives you data of approximate fuel consumption of the vehicle. (OBD DEVICES ONLY).


Track Single Driver

Reports > Track Single Driver:

If you have more than one driver and you wish to track only a single driver, you can use this option.

Select the Driver> Click on Submit. This will redirect you to a new tab where you can track the device in real-time


Driver Safety Report

Reports > Driver Safety Report:

This option provides a "Driver Safety Score" based on some criteria, for a selected driver. It also provides a detailed report on driver safety score results for the last 30 days.


Trip report

Reports > Trip report:

This report helps to differentiate the trips and gives data according to the TRIPS


Current location Report

Reports > Current location Report:

This report gives the last location data of the device.

ALEXA

Enable Alexa support, to get Live Tracking details from Alexa enabled devices.


Let’s check compatibility